

Many of us find the need to mark our maps, draw in areas, and annotate decisions. We all have a preferred method depending on our needs. Tim prefers map printouts annotated with red pen. I mark up maps more digitally by using sharpie on my computer monitor (not really, IT would hate me). Below we'll show you how to mark up your GIS map (without resorting to ink-based marking devices). Within the Markup tab, you'll see your drawing options by clicking the triangle next to the drawing button.
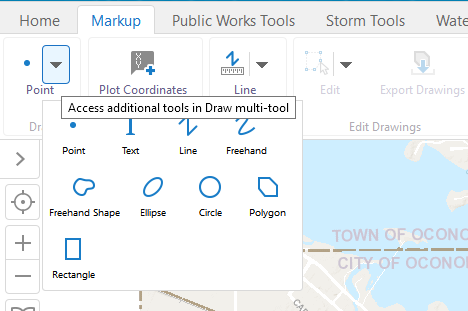
Click a shape to draw and you'll see even more menu options appear.
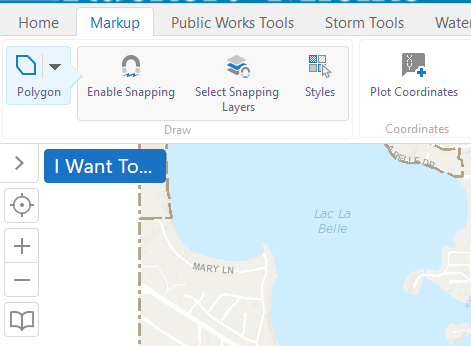
If you enable snapping, you will gain the ability to snap your drawing to features on the map. These features that are able to be snapped will also be in the list of available layers if you click on Select Snapping Layers.
By selecting or deselecting layers in that list you will be able to control which layers you can snap to in your map.
The styles button will open up a new window that will allow you to select different colors and line types for your desired line.

To edit your markup, simply click the Edit button in the edit drawings tool area; this can only be done once you have drawn markup on your map. After you have clicked "Edit," click a shape or drawn feature to edit the vertices, size, and rotation along with the styles.
Note, unlike permanent marker which stays on your screen forever, markup will disappear once you close the map. If you'd like to save the markup to read/edit later, you can do so by using the "Save Projects" functionality.
